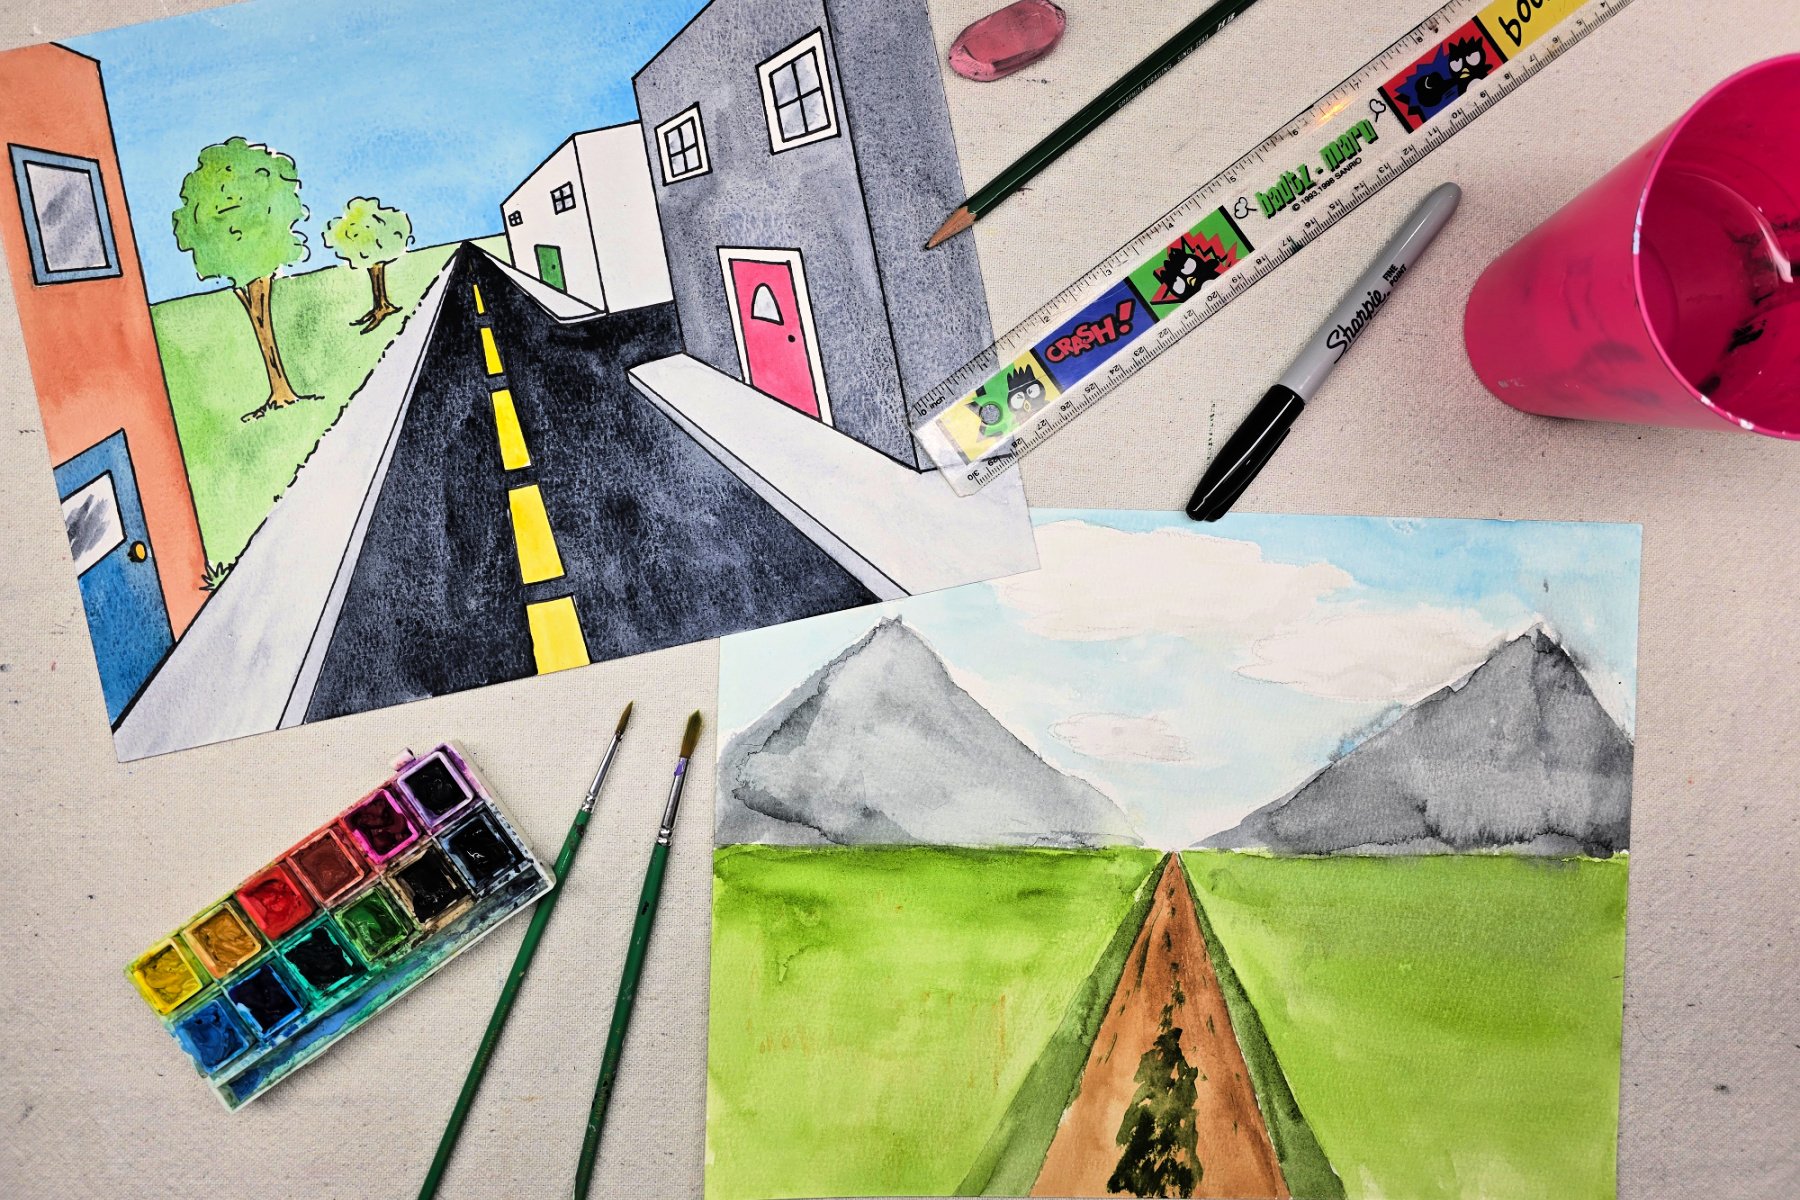
School-aged kids will learn how to create art using one point perspective in this fun project. This basic technique can easily be used at home or in the classroom.

What is one point perspective?
One-point perspective is a drawing method that shows how things appear to get smaller as they get further away, converging towards a single “vanishing point” on the horizon line.
By using one point perspective, artists can direct the viewers attention to a certain area. Perspective also gives the illusion of depth, distance, size, etc. Once kids learn how easy it is to draw in one point perspective, they can use that knowledge to enhance future projects.
Related: Kids also enjoy this interactive dinosaur project when learning about one point perspective.
Supplies Needed to Make This One Point Perspective Art Project

- Watercolor Paper
- Watercolor Paints
- Water
- Paper Towel
- Paintbrushes
- Pencil
- Ruler
- Permanent Marker (optional)
Directions to Make one point perspective art
Step 1

First, use a pencil to lightly draw a dot near the center of the paper. This will be the vanishing point in the project.
Step 2

Then, use a ruler to draw a line across the paper crossing through the vanishing point drawn in step 1. This will be the horizon line for your drawing.
Step 3

Next, use a ruler to lightly draw multiple guidelines passing through the vanishing point in various directions. Note: Draw lightly since these may be erased later on.
Step 4

Use a pencil to lightly sketch a drawing within guidelines. Drawing in this way will cause items to be smaller the closer they are to the vanishing point. This perspective technique gives the illusion of depth within the artwork, making it appear that the smaller objects are further away, while the larger ones appear closer to the viewer. Kids can add as many guidelines as necessary to achieve the desired sketch.
Step 5

Erase unwanted pencil lines. Optional: Trace final sketch with a permanent marker beforehand to make erasing unwanted lines easier.
Step 6

Finally, use watercolors to paint your design.
Finished One Point Persective Art Project

These paintings turned out great! Since these projects are made on paper, they can easily be framed, clipped, or displayed in your preferred style.
Our Experience Making this one point perspective Art Project
Drawing guidelines can be a struggle for some students. They may see it as an unnecessary step, or extra work. If done correctly, I feel they always end up impressed with their final results. I also love the freedom this project allows each student since it gives no set instructions on what scene they are to create. Kids are free to explore their own designs and creations within the number of guidelines they choose to draw.
Prep Time
5 minutes
Active Time
20 minutes
Total Time
25 minutes
Difficulty
Medium
Estimated Cost
$1
Tools
- Watercolor Paints
- Water
- Paper Towel
- Paintbrushes
- Pencil
- Ruler
- Permanent Marker (optional)
Instructions
- Use a pencil to lightly draw a dot near the center of the paper. This will be the vanishing point in the project.
- Use a ruler to draw a line across the paper crossing through the vanishing point drawn in step 1. This will be the horizon line for your drawing.
- Use a ruler to lightly draw multiple guidelines passing through the vanishing point in various directions. Note: Draw lightly since these may be erased later on.
- Use a pencil to lightly sketch a drawing within guidelines. Drawing in this way will cause items to be smaller the closer they are to the vanishing point. This perspective technique gives the illusion of depth within the artwork, making it appear that the smaller objects are further away, while the larger ones appear closer to the viewer. Kids can add as many guidelines as necessary to achieve desired sketch.
- Erase unwanted pencil lines. Optional: Trace final sketch with a permanent marker beforehand to make erasing unwanted lines easier.
- Use watercolors to paint your design.
Notes
One Point Perspective Art Variations
- Use cardstock and a dry medium, such as crayons or colored pencils, to complete project.
- Draw a scene to fit a particular theme or season.
- Move vanishing point to another location on the page to see how this alters overall image design.
One Point Perspective Art Variations
- Use cardstock and a dry medium, such as crayons or colored pencils, to complete project.
- Draw a scene to fit a particular theme or season.
- Move vanishing point to another location on the page to see how this alters overall image design.
Other Fun Art Projects from Kids Activities Blog
Did your kids enjoy drawing using this one point perspective technique? What scene did they choose to draw?
Trending Products


