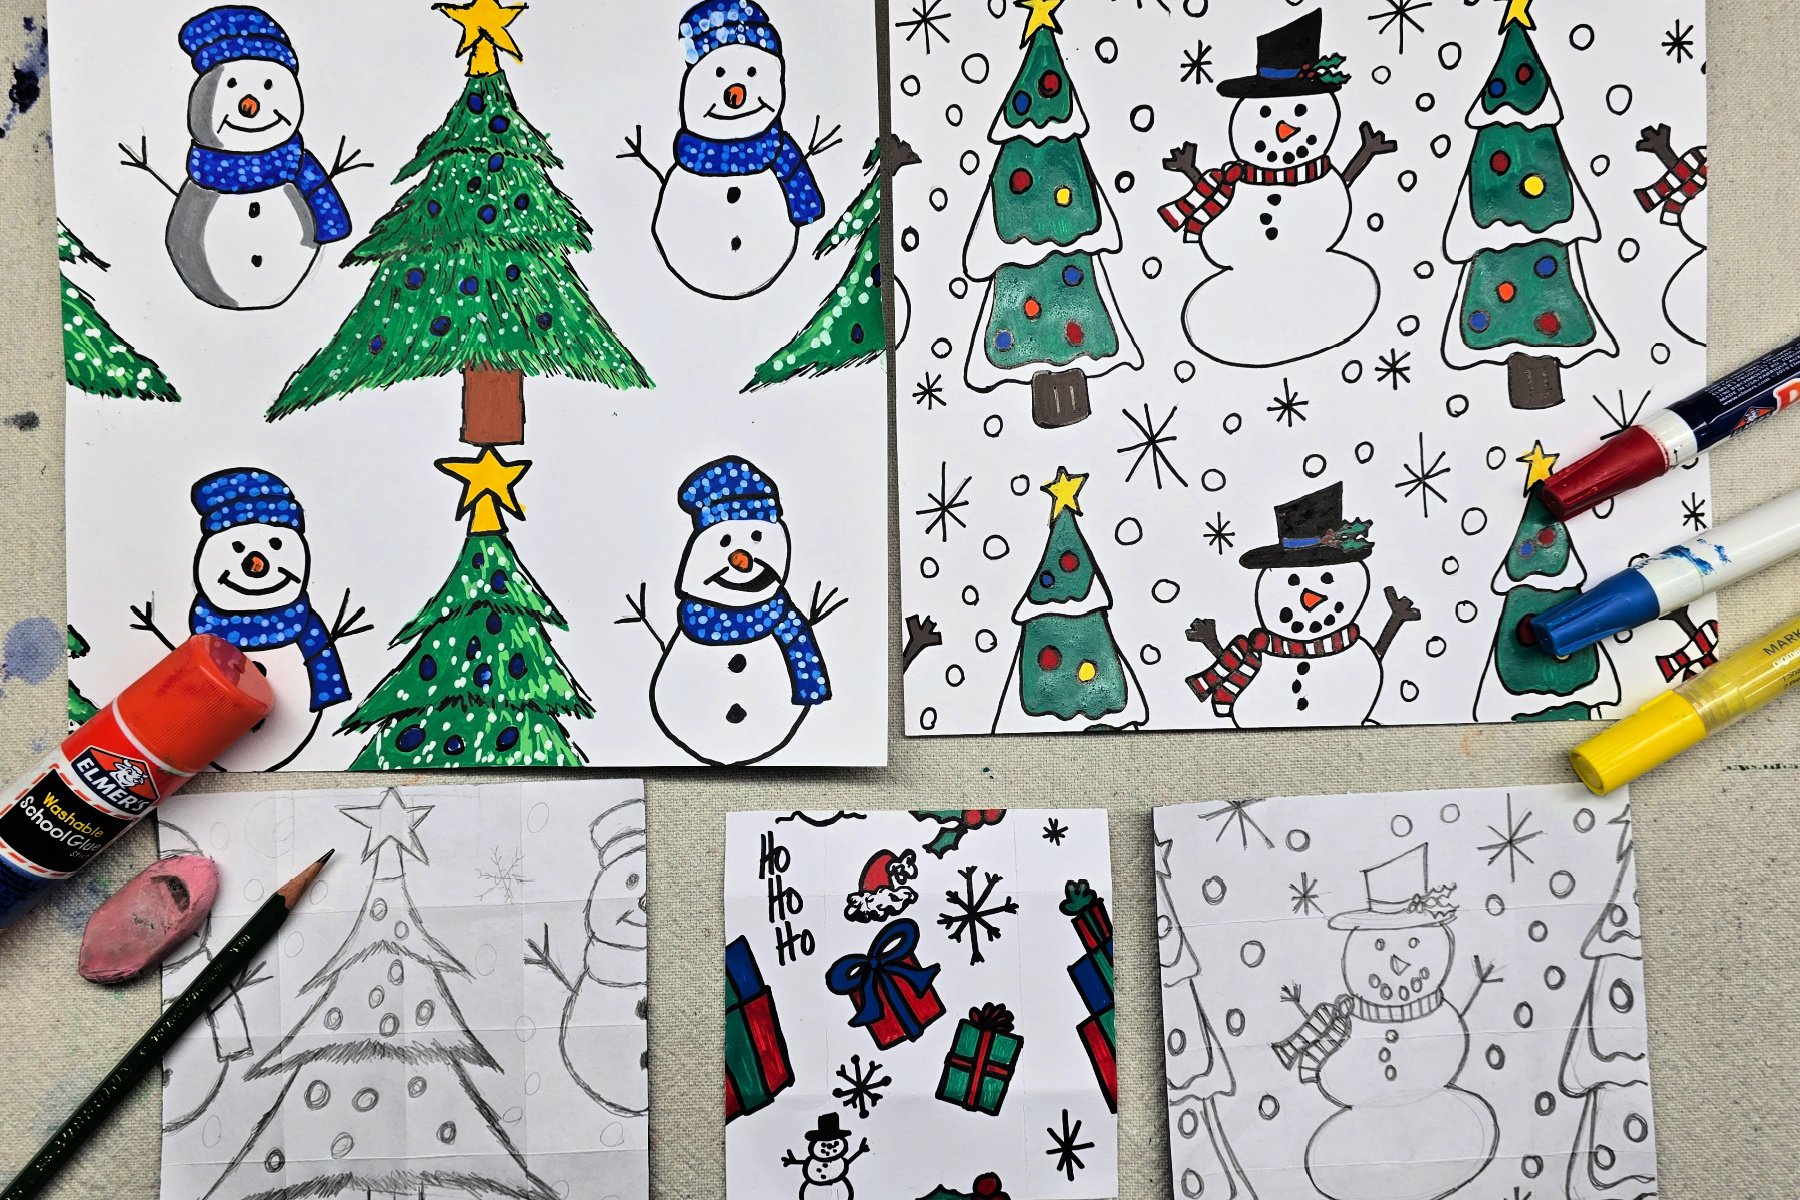
School-aged kids will learn to draw repeating patterns in this easy project. This mess-free project uses a folded paper technique that is perfect for home or classroom use.

Creating patterns
Kids will learn to fold a square piece of paper using a special technique that allows them to create repeating patterns. This mess-free project gives kids a chance to create a variety of patterns using their individual creativity and skill level.
Related: Kids can create tessellations using a cutting technique.
Supplies Needed to Make This Festive Repeating Pattern Art Project

- Copy Paper – cut into squares (we used 5inch squares)
- Carbon Paper – cut the same size as the copy paper
- Cardstock
- Pencil
- Coloring Medium – Crayons, Markers, Colored Pencils, Paint Markers, etc.
- Stick Glue or Tape
Directions to Make Festive Repeating Patterns
Step 1

Begin by sketching a design in the middle of your paper square. Do not allow this design to reach the edges of the page.
Step 2

Keeping the image on the outer side of the paper, fold the square in half to create a vertical crease line. Unfold.
Step 3

Next, fold both sides into the center crease line created in the previous step. Note: Use care to not overlap sides or leave a gap as it could impact the pattern.
Step 4

Then, draw a festive design covering both flaps, keeping away from the top and bottom edges. Unfold.
Step 5

Next, fold paper square in half to create a horizontal crease line. Unfold.
Step 6

Without overlapping previous sketches, draw designs to cover both flaps. Again, refrain from drawing on the outer edge of the paper. Unfold.
Step 7

If desired, add designs to fill in any empty places. Again, do not draw on the outer edges of the square.
Step 8

Use a small amount of stick glue or tape to attach carbon paper to the back side of the square pattern.
Step 9

Trace over the design to transfer it to the cardstock. Continue to move and trace the design square until the entire page is covered by the repeating pattern.
Step 10

Finally, add color and finishing touches to complete your pattern.
Finished Festive Repeating Pattern Art Project

I love our cute and festive repeating pattern creations! Since these projects are made on paper, they can easily be framed, clipped, or displayed with your seasonal decorations.
Our Experience Making this Festive Repeating Pattern Art Project
This is such a fun and easy project! I love this folded paper technique to create repeating patterns. This provides younger ones a chance to create deigns without having to cut and move pieces as with other patterned or tessellation projects.
Prep Time
5 minutes
Active Time
20 minutes
Total Time
5 minutes
Difficulty
Medium
Estimated Cost
$1
Materials
- Copy Paper – cut into squares (we used 5inch squares)
- Carbon Paper – cut the same size as the copy paper
- Cardstock
Tools
- Pencil
- Coloring Medium – Crayons, Markers, Colored Pencils, Paint Markers, etc.
- Stick Glue or Tape
Instructions
- Sketch a design in the middle of your paper square. Do not allow this design to reach the edges of the page.
- Keep the image on the outer side of the paper and fold the square in half to create a vertical crease line. Unfold.
- Fold both sides into the center crease line created in the previous step. Note: Use care to not overlap sides or leave a gap as it could impact the pattern.
- Draw a festive design covering both flaps, keeping away from the top and bottom edges. Unfold.
- Fold paper square in half to create a horizontal crease line. Unfold.
- Without overlapping previous sketches, draw designs to cover both flaps. Again, refrain from drawing on the outer edge of the paper. Unfold.
- If desired, add designs to fill in any empty places. Again, do not draw on the outer edges of the square.
- Use a small amount of stick glue or tape to attach carbon paper to the back side of the square pattern.
- Trace over the design to transfer it to the cardstock. Continue to move and trace the design square until the entire page is covered by the repeating pattern.
- Add color and finishing touches to complete your pattern.
Notes
Festive Repeating Pattern Art Variations
- Transfer design onto canvas and paint completed project.
- Adapt project to fit any season or theme.
- Adjust size of pattern square to create various sized art.
Festive Repeating Pattern Art Variations
- Transfer design onto canvas and paint completed project.
- Adapt project to fit any season or theme.
- Adjust size of pattern square to create various sized art.
Other Fun Pattern Art Projects from Kids Activities Blog
Did your kids enjoy creating these festive repeating patterns? What objects did they include in their pattern?
Trending Products
