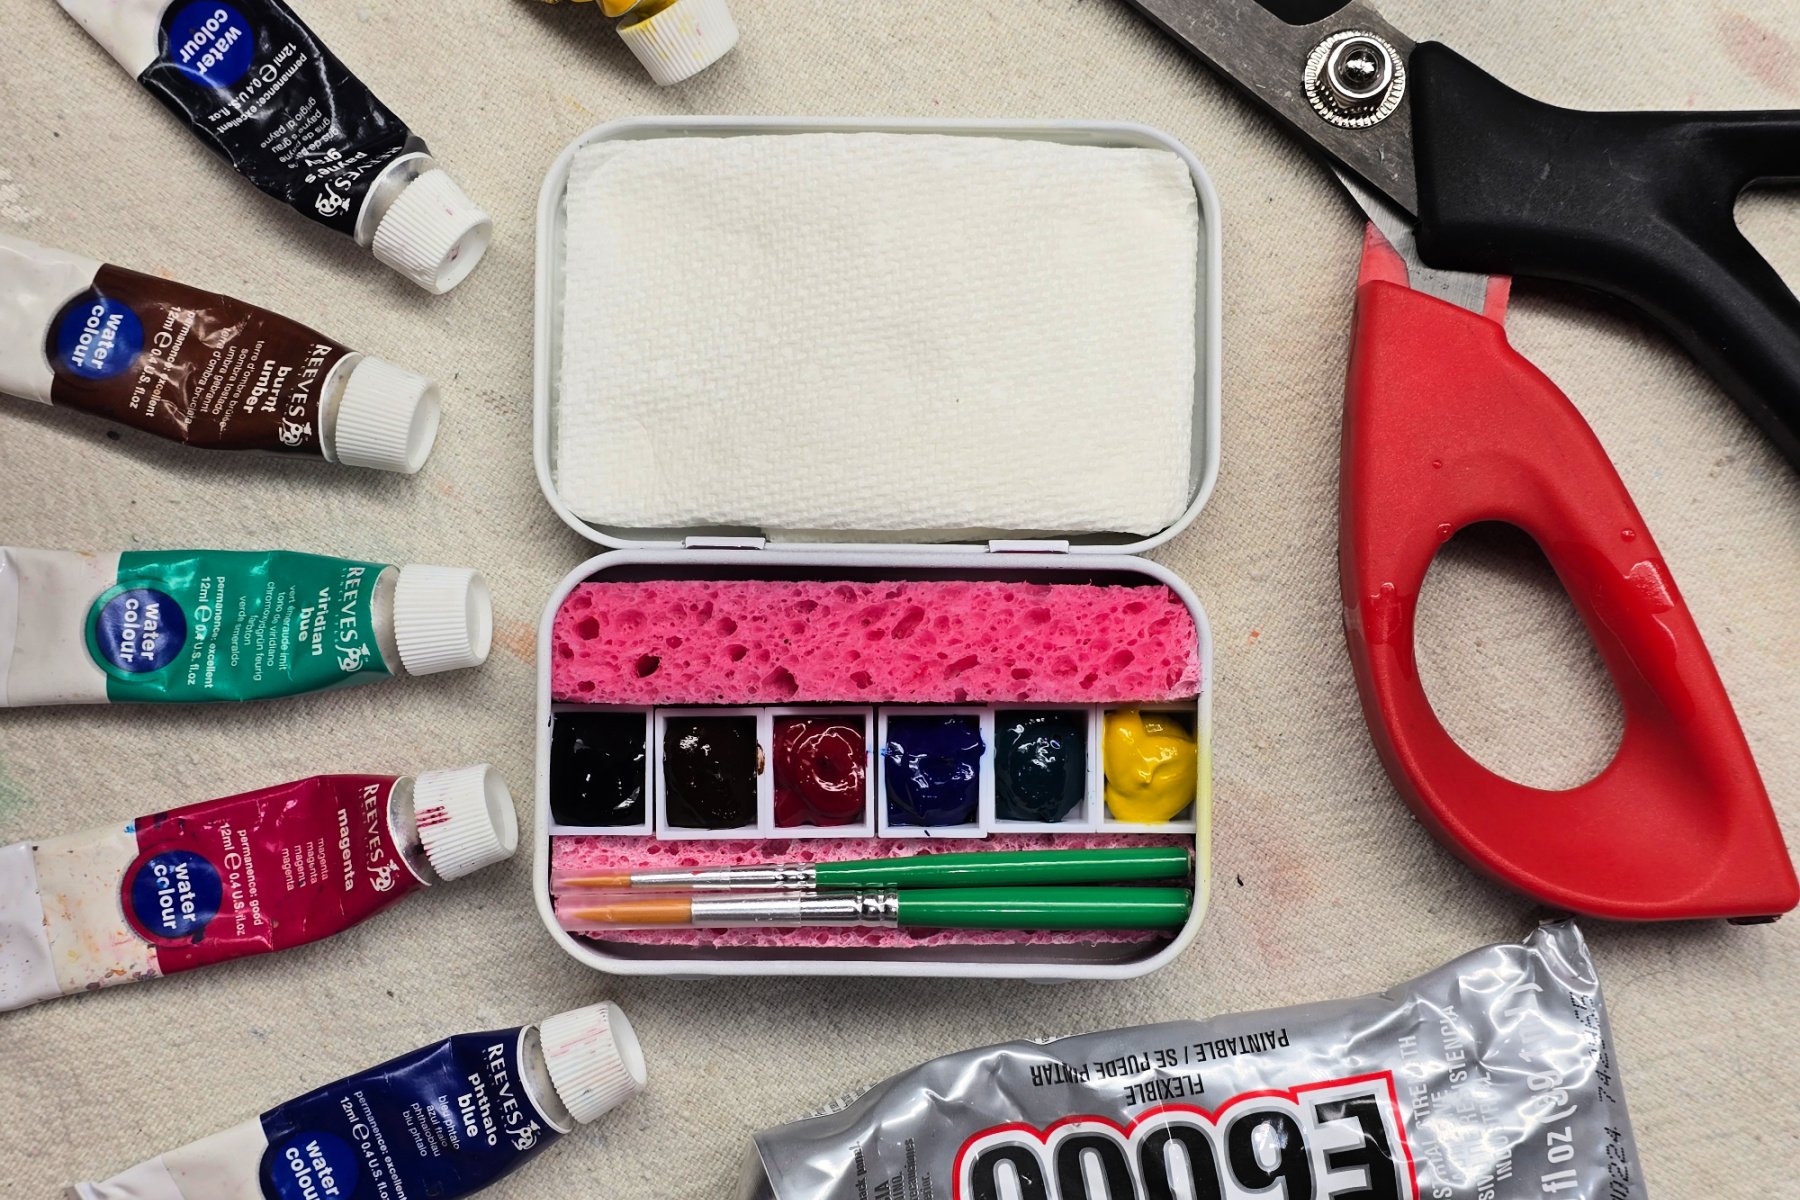
Older kids will learn how to make a small travel watercolor palette in this fun project. This technique can easily be used at home or in the classroom.

Why DIY a Watercolor Palette?
Making your own travel watercolor palette allows you to customize the palette to fit your individual needs. With this design, each artist is able to add their choice of colors to the palette, rearrange the palette based on their needs, and take their paints with them wherever they go!
Related: Use your new palette to practice these fun Watercolor Techniques!
Supplies Needed to Make a DIY Watercolor Palette Art Project

- Small Metal Container – We Recycled an Empty Mint Container
- Watercolor Tube Paints – Various Colors
- Empty Watercolor Pans
- Small Magnets
- Strong Waterproof Glue – We Used E6000
- Sponge
- Paint Brush
- Fine Sandpaper
- Spray Paint – Consider a Rust-Proof Paint
- Scissors – or Other Cutting Tool
- Protected Surface and Ventilated Work Area
Directions to Make a DIY Watercolor Palette
Note: Adult supervision and assistance recommended for this project, based on age and skill of child.
Step 1

To begin, carefully measure, cut and sand any tools you may want to add to your palette (such as paintbrushes, pencils, etc).
Step 2

Next, place items in container to determine palette layout.
Step 3

Optional: Use a fine sandpaper to lightly sand palette case before painting, both inside and out.
Step 4

While the case is drying, glue magnets to the bottom of your paint pans. Tip: Keep distance between the magnets so they don’t accidentally attach to one another while the glue is still wet.
Step 5

Fill palette with supplies once the paint and glue are dry. Your palette is now ready to use!
Step 6

Including a basic kitchen sponge in your palette offers an easy way to wet your brush, your paints, and clean your palette once you are through painting.
Step 7

When finished painting, simply remove sponges and rinse under water. Allow palette and supplies to dry before storing.
Finished DIY Watercolor Palette Art Project

I love these DIY palettes! They are a completely customizable way for artists to create on the go.
Our Experience Making this DIY Watercolor Palette Art Project
Making this pocket-sized watercolor palette was lots of fun. It is always great to be able to DIY a project and recycle in the process! I love how easy it is to customize this palette based on my own artistic needs. I was pleased to see that I was able to fit everything I needed into the palette, other than my sketchbook!
You may notice that my palette lid remained dyed from the watercolor paints. I believe this was simply due to my use of flat spray paint. I personally chose to use flat paint to prevent my paints from beading up when trying to mix them. I recommend skipping the sanding and painting step, or using a glossy paint if you wish to deter stains. The flat paint on the exterior also allows you to more easily customize the case with acrylic pain pens, decoupage, etc.
Prep Time
5 minutes
Active Time
2 hours
Total Time
2 hours 5 minutes
Difficulty
Medium
Estimated Cost
$10
Materials
- Small Metal Container – We Recycled an Empty Mint Container
- Watercolor Tube Paints – Various Colors
- Empty Watercolor Pans
- Small Magnets
- Sponge
- Paint Brush
- Spray Paint – Consider a Rust-Proof Paint
Tools
- Strong Waterproof Glue – We Used E6000
- Fine Sandpaper
- Scissors – or Other Cutting Tool
- Protected Surface and Ventilated Work Area
Instructions
Note: Adult supervision and assistance recommended for this project, based on age and skill of child.
- Carefully measure, cut and sand any tools you may want to add to your palette (such as paintbrushes, pencils, etc).
- Place items in container to determine palette layout.
- Optional: Use a fine sandpaper to lightly sand palette case before painting, both inside and out.
- While the case is drying, glue magnets to the bottom of your paint pans. Tip: Keep distance between the magnets so they don’t accidentally attach to one another while the glue is still wet.
- Fill palette with supplies once the paint and glue are dry. Your palette is now ready to use!
- Including a basic kitchen sponge in your palette offers an easy way to wet your brush, your paints, and clean your palette once you are through painting.
- When finished painting, simply remove sponges and rinse under water. Allow palette and supplies to dry before storing.
Notes
DIY Watercolor Palette Art Variations
- Fill with gouache instead of watercolors.
- Cut pencils or other art tools down to fit in the palette.
- Decorate the outside of the container using acrylic paints, decoupage, etc.
DIY Watercolor Palette Art Variations
- Fill with gouache instead of watercolors.
- Cut pencils or other art tools down to fit in the palette.
- Decorate the outside of the container using acrylic paints, decoupage, etc.
Other Fun on-the-go Art Projects from Kids Activities Blog
Did your kids enjoy making their own DIY Watercolor Palettes? What adjustments did they make for the palette to be better suited for their needs?
Trending Products
