Today we’re making DIY water bottle bracelets! Kids of all ages are going to love making these super cute, colorful, and unique DIY bracelets. I love crafts that upcycle things we have around the house and this fun craft does just that. Older kids and younger kids alike are going to love this bracelet craft. Plus, you can make these DIY bracelets at home or in the classroom.

DIY Bracelets For Kids
Kids can explore art and jewelry all in one craft. While toddlers, preschoolers, and kindergarteners can all make this craft, they will need assistance from parents when it comes to cutting.
But kids can explore colors, practice fine motor skills, and even explore pretend play with these DIY bracelets. So, without further ado, let’s make these super cute homemade bracelets.
This post contains affiliate links.
Related: Make your own DIY Slap Bracelet!
Supplies Needed To Make These DIY Bracelets
How To Make These Super Cute DIY Bracelets
Step 1

Decorate your water bottles.
Step 2

Cut the water bottle into rings. Cut them straight or give them shape.
Step 3

Add some more designs or decorations if you want. Put on your DIY bracelets and look fabulous!
Craft Notes:
- You can also use bigger bottles as well. You don’t have to just use water bottles. 1 and 2 liters will also work.
- Put something down to prevent permanent marker from destroying your table.
How To Make This DIY Bracelet Craft Your Own
Just like all our other crafts there are things you can do to make this DIY bracelet craft your own. You can do things like:
- Punch holes in the plastic and weave ribbons or string through it.
- Wrap the bracelet in yarn.
- Paint the bracelets with acrylic paint.
- Use mod podge and stick on pretty images.
- Glue on faux gems.
- Decorate with stickers.
Want an even more fun alternative? Our friends at One Crazy House did a similar craft that is perfect for older kids.
Video: DIY Bracelet Craft Alternative
Our Experience With This Bracelet Craft
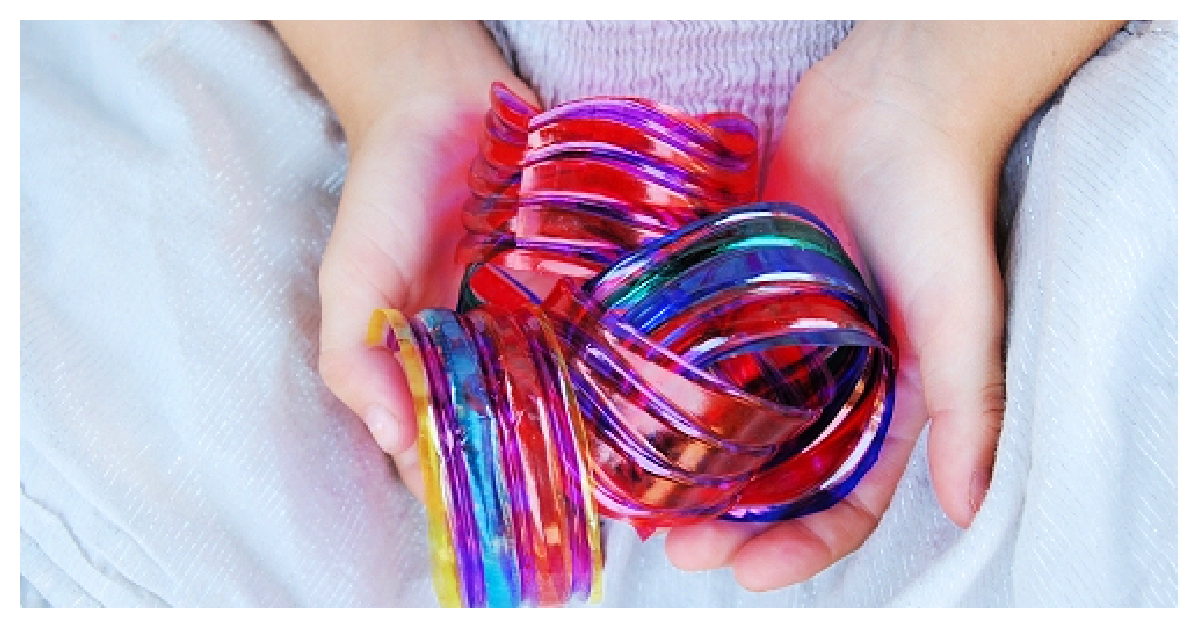
We had so much fun making homemade bracelets. We looked fabulous wearing our new jewelry. Each bracelet was colorful and unique. We used markers on a lot, especially when it came to my little ones. But the older ones got to use nail polish to decorate theirs too.
The bracelets were colorful and had glitter and polka dots and color splotches. They were amazing! And simple to make. Plus we got to reuse items that would have been recycled or thrown away. I love crafts that let us turn trash into something useful and fun.
I really hope your family had as much fun making these bracelets as we did!
Materials
- Empty Water Bottles
- Permanent Marker
- Craft Knife
- Optional: Nail Polish (for further decorating)
Instructions
- Decorate your water bottles.
- Cut the water bottle into rings. Cut them straight or give them shape.
- Add some more designs or decorations if you want. Put on your DIY bracelets and look fabulous!
More Fun Bracelet Crafts From Kids Activities Blog
How did your DIY bracelets turn out?
Trending Products