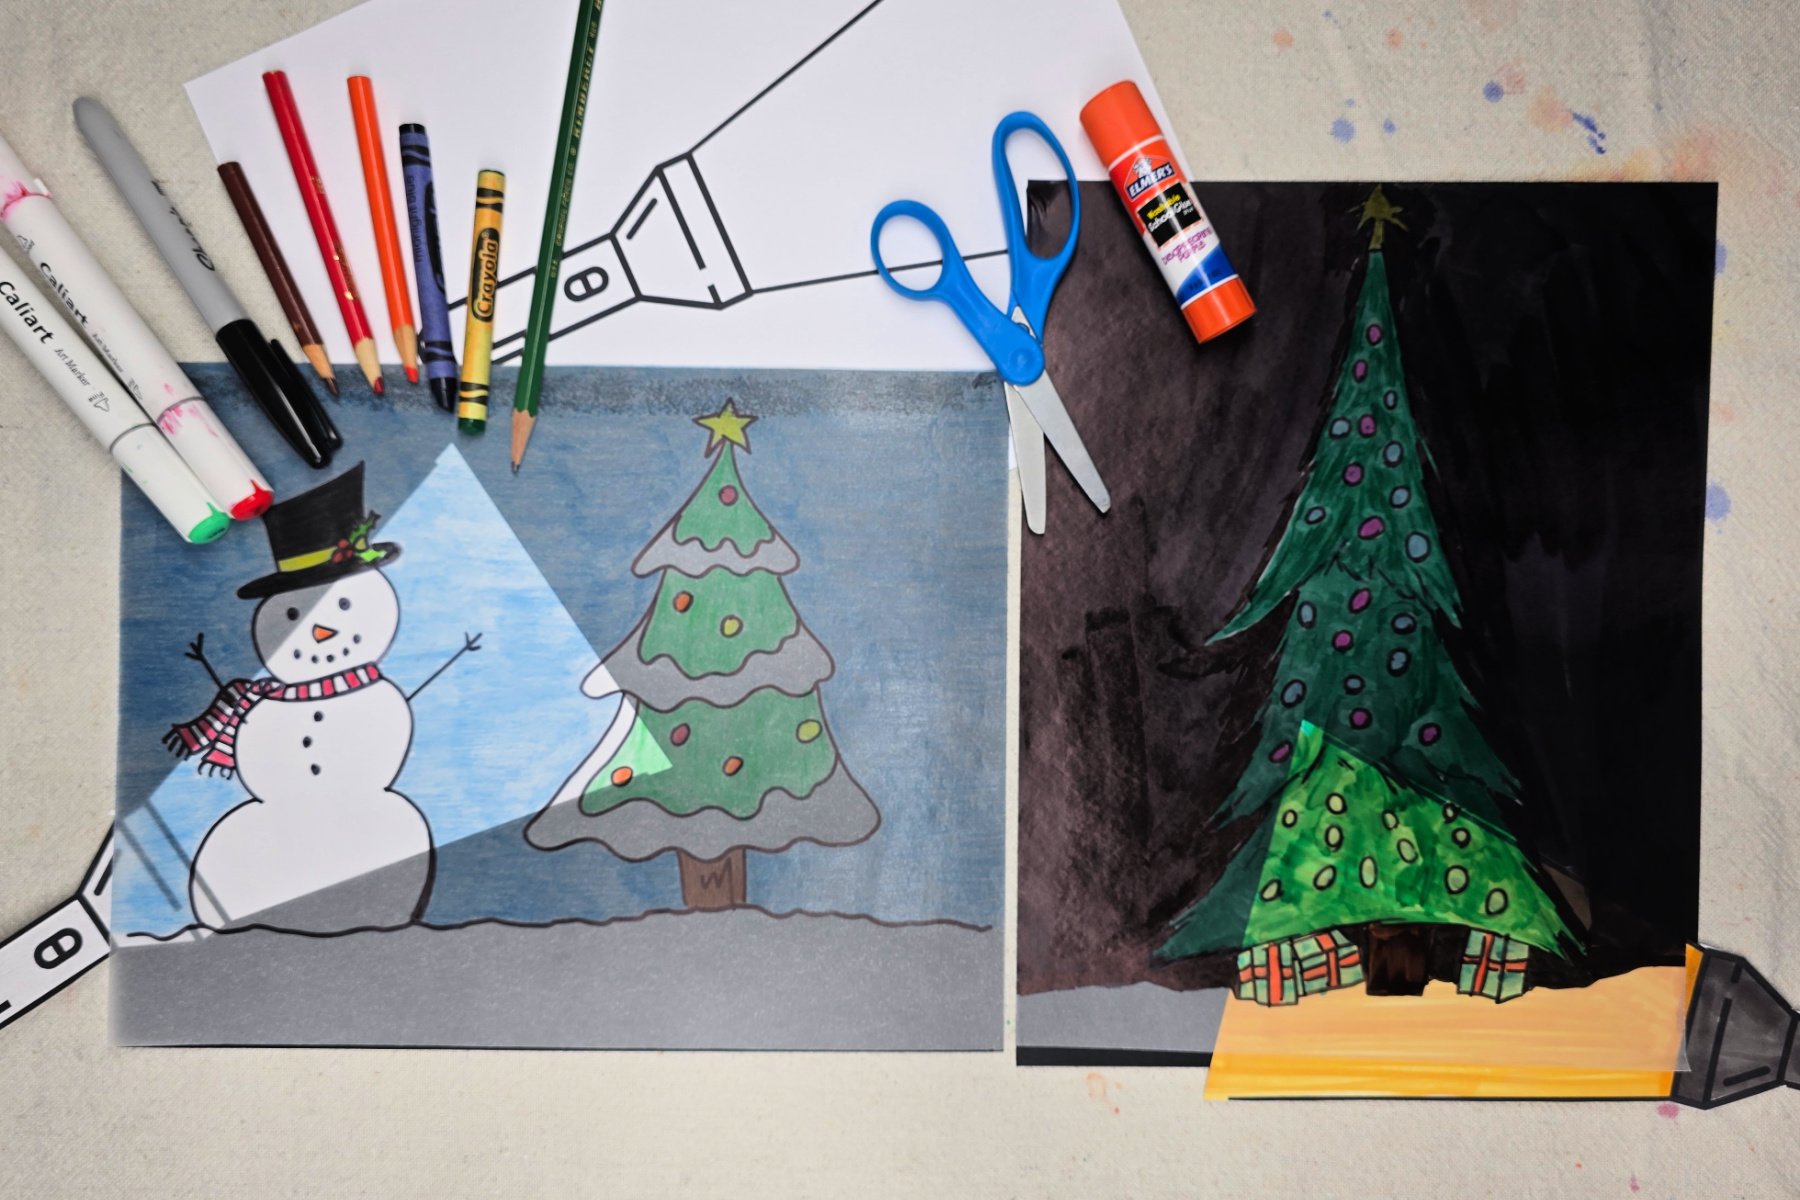
School-aged kids will create a winter scene with a flashlight illusion in this easy project. We’ve included a free printable to make this lesson perfect for home or classroom use.

Flashlight Illusion
We’re creating a fun flashlight illusion in this project by backing our image with black paper. The contrast of the bright flashlight paper against the black background gives the illusion of a lit area.
Related: Create another fun winter scene using oil pastels.
Supplies Needed to Make this flashlight winter scene Art Project

- Free Printable Flashlight Template (Download Below) – Printed on cardstock
- Tracing Paper
- Black Cardstock
- Scissors
- Pencil
- Permanent Marker
- Coloring Medium of Choice – Colored Pencils, Crayons, or Markers
- Tape or Glue
Download the Flashlight Printable Here
Using our free printable flashlight template allows kids more time to focus on their winter scene artwork. This template provides a quick and easy flashlight design for kids to readily enjoy their creations.
Directions to Make A Flashlight Winter Scene Art Project
Step 1

First, use a pencil to lightly sketch a winter scene on tracing paper.
Step 2

Next, trace sketch with permanent marker and erase unwanted pencil lines.
Step 3

Then, add color to your winter scene.
Step 4

Next, attach the tracing paper to the black cardstock. Note: Only glue or tape across the top of the picture where the flashlight can move freely underneath.
Step 5

Color and cut out the flashlight design.
Step 6

Finally, slide the flashlight between the tracing paper and black cardstock. Areas where the flashlight is “shining” will appear to be illuminated.
Finished Flashlight Winter Scene Art Project

I love how these flashlight scenes turned out! Since these projects are made on paper, they can easily be displayed in your preferred style with your holiday decorations.
Our Experience Making this flashlight winter scene Art Project
We enjoyed creating this flashlight illusion project! It’s so much fun to see kids’ reactions when they “shine” their flashlights under their designs. We learned what happens when we change the color of the flashlight beam and how that alters the brightness of the beam and colors that it interacts with.
Prep Time
5 minutes
Active Time
20 minutes
Total Time
25 minutes
Difficulty
Medium
Estimated Cost
$1
Materials
- Free Printable Flashlight Template – Printed on Cardstock
- Tracing Paper
- Black Cardstock
Tools
- Scissors
- Pencil
- Permanent Marker
- Coloring Medium of Choice – Colored Pencils, Crayons, or Markers
- Tape or Glue
Instructions
- Use a pencil to lightly sketch a winter scene on tracing paper.
- Trace sketch with permanent marker and erase unwanted pencil lines.
- Add color to your winter scene.
- Attach the tracing paper to the black cardstock. Note: Only glue or tape across the top of the picture where the flashlight can move freely underneath.
- Color and cut out the flashlight design.
- Slide the flashlight between the tracing paper and black cardstock. Areas where the flashlight is “shining” will appear to be illuminated.
Notes
Flashlight Winter Scene Art Variations
- Adapt scene to fit any season or holiday.
- Draw with permanent markers on transparency paper or binder sleeve instead of using the tracing paper.
- Have kids draw their own flashlight designs.
Flashlight Winter Scene Art Variations
- Adapt scene to fit any season or holiday.
- Draw with permanent markers on transparency paper or binder sleeve instead of using the tracing paper.
- Have kids draw their own flashlight designs.
Other Fun Winter Art Projects from Kids Activities Blog
Did your kids enjoy creating this flashlight project? What did they add to their winter scene?
Trending Products


